
Set up Tracking of Transactions in GA (Ecommerce)
Overview
With GA, you can get information about customer orders (transactions).
Transactions represent orders created. Thus, the statistics measures all customer orders regardless of payment result, including the ones that use an offline payment method.
Transaction data is transferred the first time you get to the page of successful order creation (/order/complete):
- The customer must add a product to the checkout page, enter their personal data, select a payment method, agree to the terms of sale and the processing of their personal data (if necessary) and click Continue
- After that:
- An order is created having status new / not paid
- The customer sees the page confirming the successful order creation (/order/complete) and also containing the order payment form
- The transaction data is transferred to the GTM container
More details on the data transferred in the reference guide.
Get Started
To set up tracking of transactions, you must:
- Add your GTM container to your checkout page. Follow the instructions on how to connect
- Set up a basic connection of your Google Analytics tag:
- Follow the instructions on how to connect and create an account, a Ga4 property and a data stream
- When configuring, remember the data stream identifier formatted as G-NNNNNNNNNN, as you will need it later
After these steps have been done, follow the instructions below.
How to Set Up
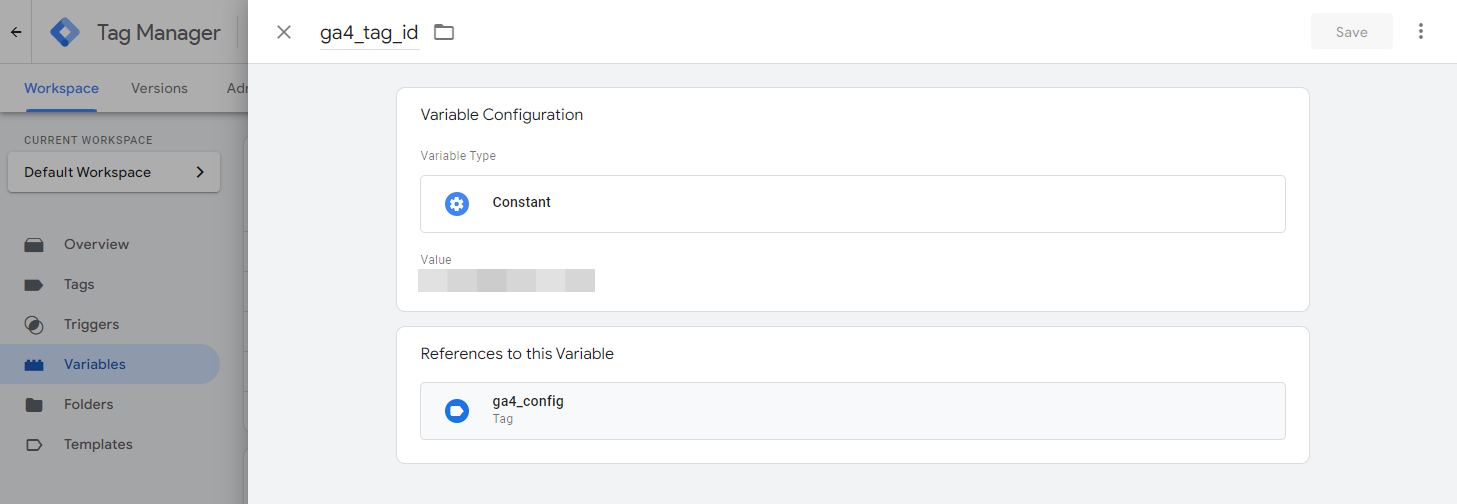
Create Variable Constant (ga4_tag_id)
On Google Tag Manager website (https://tagmanager.google.com/):
- Go to your GTM container added earlier
- Click Variables
- Create a variable having the following settings:
|
Name* |
ga4_tag_id |
|
Variable Type |
Constant |
|
Value |
Enter your data stream ID in format G-NNNNNNNNNN. You received it when created the data stream for the GA4 property earlier |
* The name of the variable given is an example. You can think of your own name for your variable.
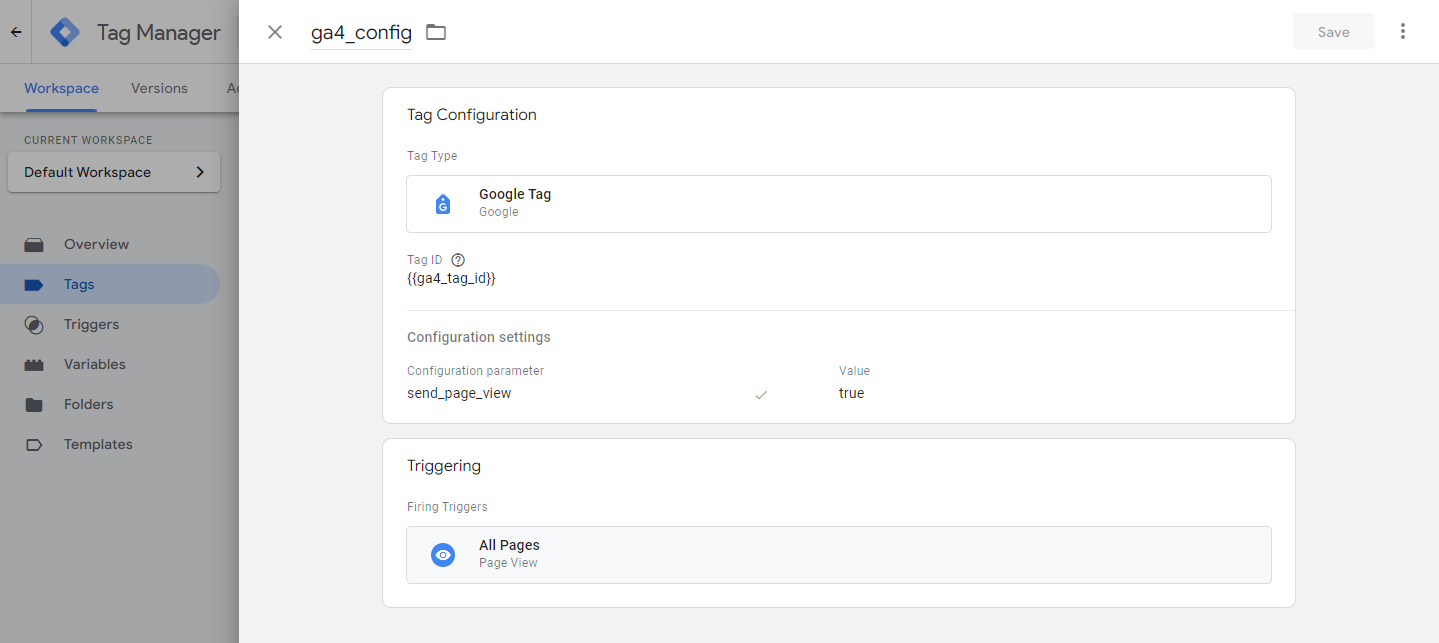
Create Google Tag (ga4_config)
On Google Tag Manager website (https://tagmanager.google.com/):
- Go to your GTM container added earlier
- Click Tags
- Create a tag having the following settings:
|
Name* |
ga4_config |
||||
|
Tag Type |
Google Tag |
||||
|
Tag ID |
Select the Variable Constant created in the previous step: {{ga4_tag_id}} |
||||
|
Configuration settings |
Add the configuration parameter:
|
||||
| Triggering |
All Pages - Page View |
* The name of the tag given is an example. You can think of your own name for your tag.
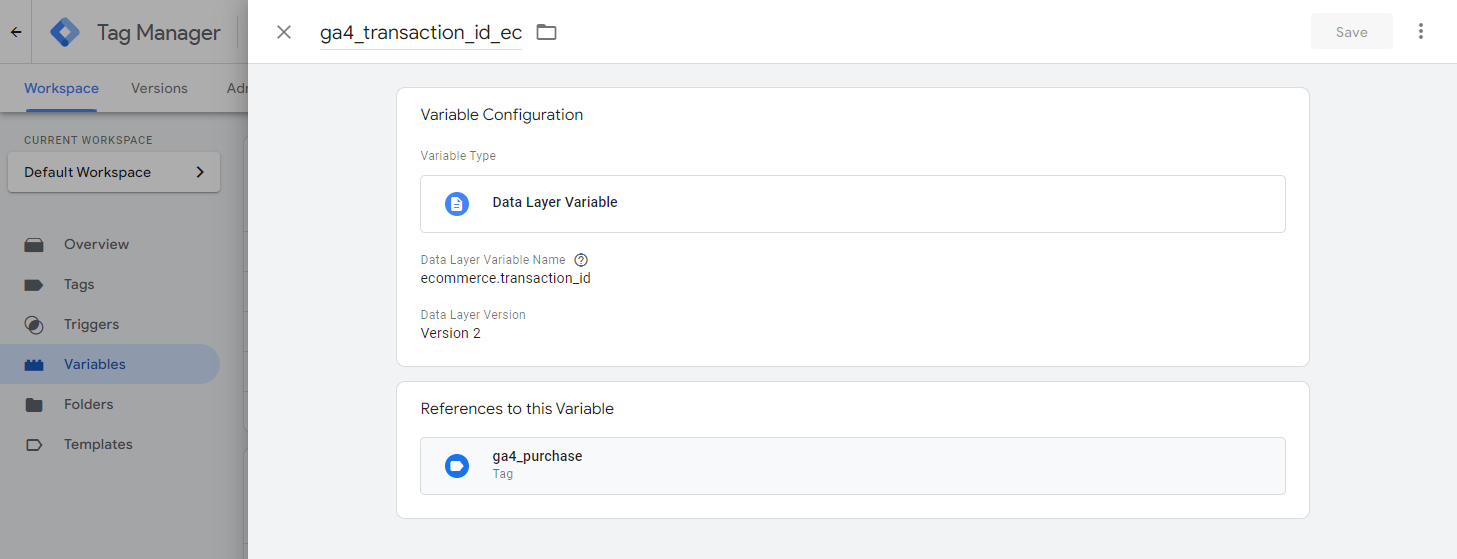
Create Data Layer Variables
On Google Tag Manager website (https://tagmanager.google.com/):
- Go to your GTM container added earlier
- Click Variables
- Create some variables having the following settings:
|
Name* |
Variable Type |
Data Layer Variable Name (must not modify!) |
Data Layer Version |
|
ga4_affiliation_ec |
Constant |
ecommerce.affiliation |
Version 2 |
|
ga4_coupon_ec |
Constant |
ecommerce.coupon |
Version 2 |
|
ga4_currency |
Constant |
ecommerce.currency |
Version 2 |
|
ga4_items_ec |
Constant |
ecommerce.items |
Version 2 |
|
ga4_shipping_ec |
Constant |
ecommerce_shipping |
Version 2 |
|
ga4_tax_ec |
Constant |
ecommerce.tax |
Version 2 |
|
ga4_transaction_id_ec |
Constant |
ecommerce.transaction_id |
Version 2 |
|
ga4_value_ec |
Constant |
ecommerce.value |
Version 2 |
* The names of the variables given are examples. You can think of your own names for your variables. Note that the Data Layer Variable Name must not be modified. The data transferred will be compared with the variable by this name. For the description of values, see the reference guide.
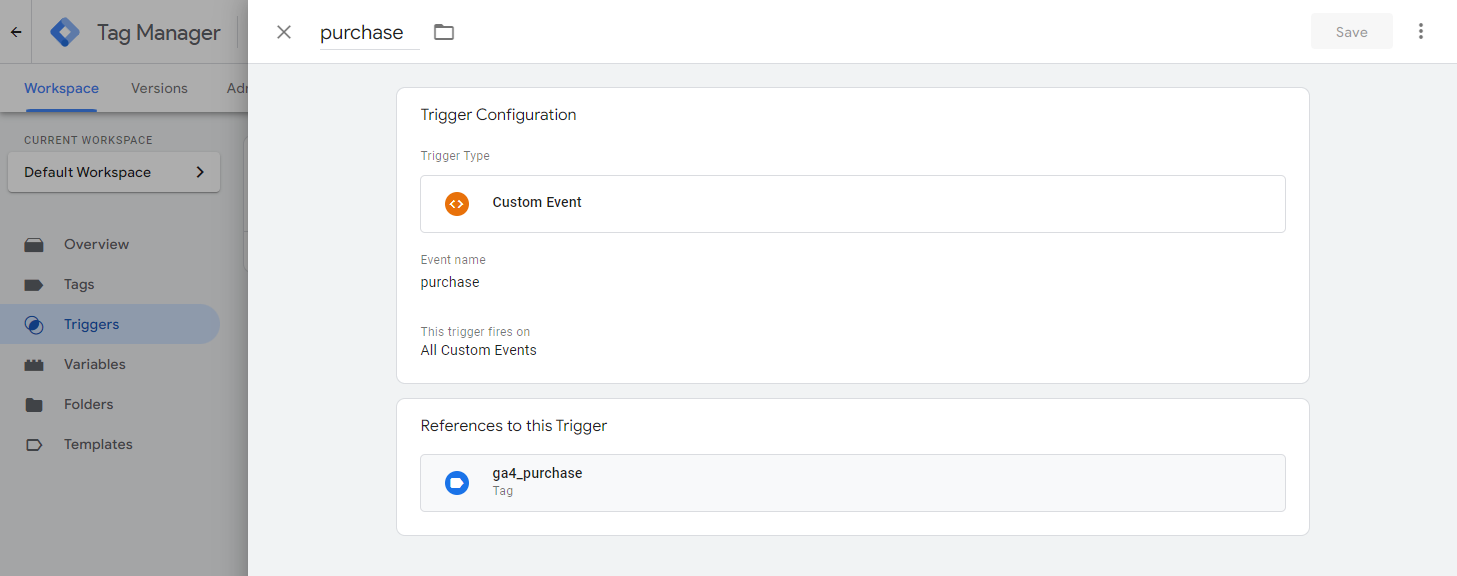
Create Purchase Event Trigger
On Google Tag Manager website (https://tagmanager.google.com/):
- Go to your GTM container added earlier
- Click Triggers
- Create a trigger having the following settings:
|
Name* |
purchase |
|
Trigger Type |
Custom Event |
|
Event name |
purchase |
|
This trigger fires on |
All Custom Events |
* The name of the trigger given is an example. You can think of your own name for your trigger. Note that the Trigger Name must not be modified.
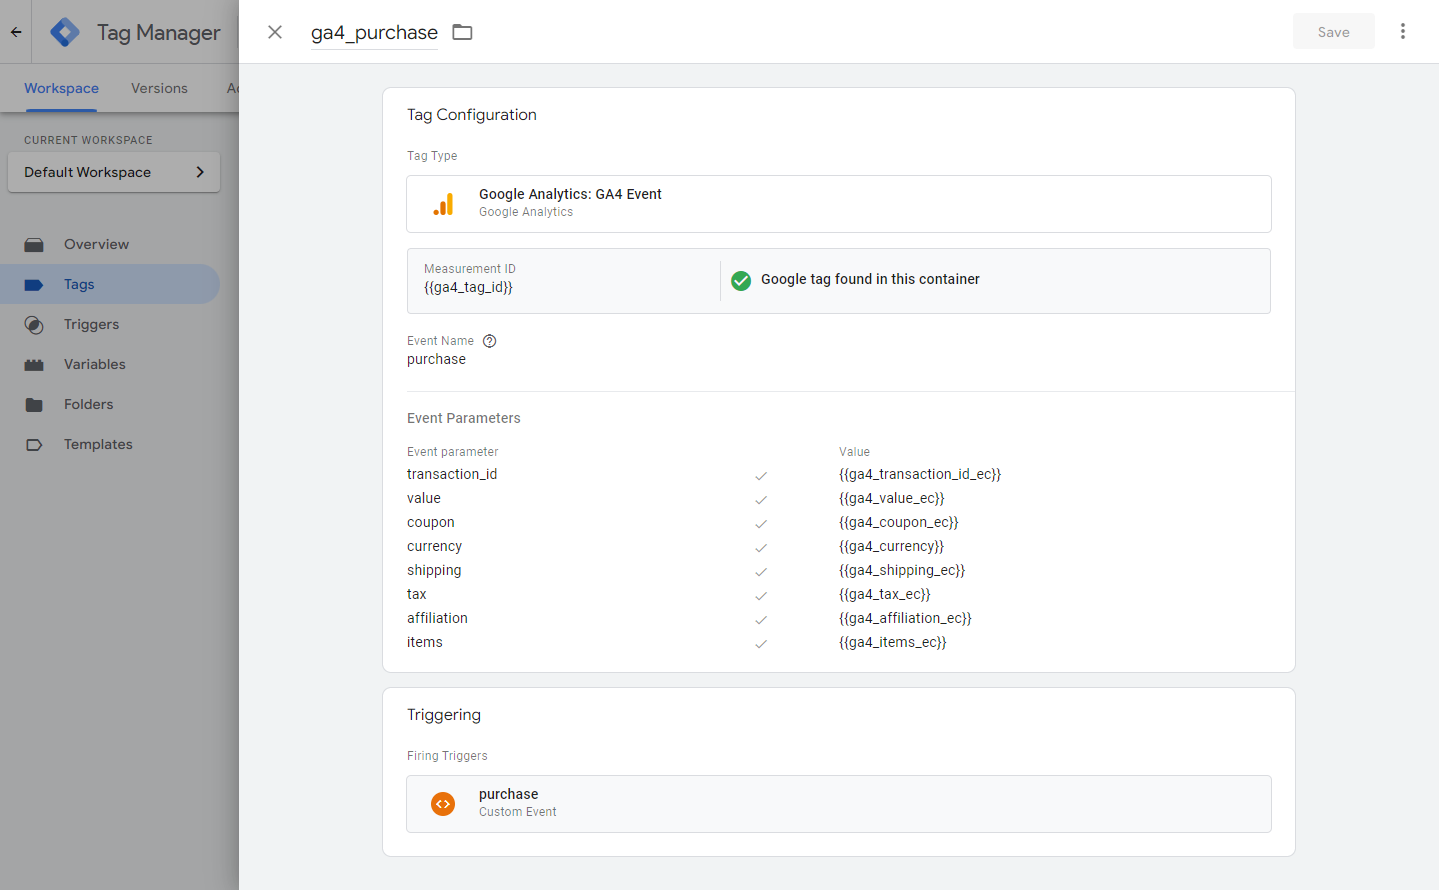
Create GA4 Event Tag (ga4_purchase)
On Google Tag Manager website (https://tagmanager.google.com/):
- Go to your GTM container added earlier
- Click Tags
- Create a tag having the following settings:
|
Name* |
ga4_purchase |
||||||||||||||||||
|
Tag type |
Google Analytics: GA4 event |
||||||||||||||||||
|
Measurement ID |
Select the Variable Constant created in the previous step: {{ga4_tag_id}} |
||||||||||||||||||
|
Event Name |
Select the purchase event trigger name created earlier: purchase |
||||||||||||||||||
|
Event Parameters |
Add the data layer variables created earlier:
|
||||||||||||||||||
| Triggering |
Select the purchase event trigger created earlier: purchase |
* The name of the tag given is an example. You can think of your own name for your tag.
Publish Containers
On Google Tag Manager website (https://tagmanager.google.com/):
- Go to your GTM container created earlier
- Click Submit at the top right-hand side of the main page
View Statistics
You can view transaction data in GA4 via the Monetization overview tab.
For example, in the Ecommerce Purchases report, you can get revenue statistics grouped by product name, ID, category (product business segment).
More details in Google Analytics Help:
To get detailed information, use creation of custom reports via the Explorations tab. Here you can customize reports by adding dimensions and metrics from the Ecommerce tab.


See Google Analytics Help for more details on how to set up Ecommerce exploration solutions.
You can see the transaction data we transfer to GTM in the reference guide.